
Kemerton xl making improvements
The Auto-Sleeper Motorhome Owners Forum (ASOF) :: Auto-Sleeper Motorhome Forums :: Auto-Sleeper "Van Conversions" Forum
Page 7 of 7 •  1, 2, 3, 4, 5, 6, 7
 Re: Kemerton xl making improvements
![]() by glyne lock Sat Dec 30, 2023 6:33 pm
by glyne lock Sat Dec 30, 2023 6:33 pm
To help your battery life when parked up not in use the pin can be fitted as in the picture of the carbon monoxide alarm
glyne lock- Member

-

Posts : 1810
Joined : 2019-10-18
Location : taunton
Auto-Sleeper Model : kemerton xl
Vehicle Year : 2019
Re: Kemerton xl making improvements
![]() by Suppersready Sat Dec 30, 2023 8:16 pm
by Suppersready Sat Dec 30, 2023 8:16 pm
glyne lock wrote:a wind turbine so i have even got power when the sun goes down at night and this one is a 1000w
this one just needs a solid pole a new
Please could you provide a link to this ?
_________________
Wine is proof God loves us

Suppersready- Donator

-
Posts : 1118
Joined : 2017-02-12
Member Age : 62
Location : Worcestershire
Auto-Sleeper Model : Corinium FB
Vehicle Year : 2017
Re: Kemerton xl making improvements
![]() by glyne lock Sun Dec 31, 2023 5:20 pm
by glyne lock Sun Dec 31, 2023 5:20 pm
I have now put a stop to that and the problem of wet coming in the vent
The vent is sealed over and I have put vents above the microwave
So 2 problems solved the wet getting in and cold and damp air
The microwave will now blow the air from the fan and come out the vents I have fitted [You must be registered and logged in to see this link.]
glyne lock- Member
-
Posts : 1810
Joined : 2019-10-18
Location : taunton
Auto-Sleeper Model : kemerton xl
Vehicle Year : 2019
Re: Kemerton xl making improvements
![]() by Guest Sun Dec 31, 2023 5:32 pm
by Guest Sun Dec 31, 2023 5:32 pm

Guest- Guest
Re: Kemerton xl making improvements
![]() by glyne lock Sun Dec 31, 2023 5:42 pm
by glyne lock Sun Dec 31, 2023 5:42 pm
I also put a plastic lid below to catch any water that you could get from condensation
Filled the area with dacron
All the new holes when drilled sealed the area before fitting the vents
I also sealed the vent on the inside to stop any leak and need to remove the vent to reseal
glyne lock- Member
-
Posts : 1810
Joined : 2019-10-18
Location : taunton
Auto-Sleeper Model : kemerton xl
Vehicle Year : 2019
Guest- Guest
Re: Kemerton xl making improvements
![]() by timsurf2021 Mon Jan 01, 2024 9:53 am
by timsurf2021 Mon Jan 01, 2024 9:53 am
Tim.

timsurf2021- Member
-
Posts : 126
Joined : 2021-11-24
Location : Eastleigh Hampshire
Auto-Sleeper Model : Kingham
Vehicle Year : 2021
Re: Kemerton xl making improvements
![]() by glyne lock Mon Jan 01, 2024 10:59 am
by glyne lock Mon Jan 01, 2024 10:59 am
To put a hole in the van for just a vent for the cooling fan is not great
A microwave in a unit in your house would just vent out the back and out the top of the unit so I have just done the same .the small vents for 20 was just a few pounds. A tube of sealant I already had so no cost there .yes this will stop the problem you had from the repair you did .mine was dry and ok but just washing the van could put water in the vent .when I was cooking my tea the cold air was blowing in my face from underneath the microwave when the wind was blowing at the side of the van. So when you have the heating going it’s having to work more with the cold air from the vent.
So yes a mod worth doing for a small cost
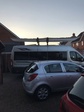
A picture to show the outside still looks the same just a blanked off vent on the inside .so keeps the camper looking tidy[You must be registered and logged in to see this link.]
glyne lock- Member
-
Posts : 1810
Joined : 2019-10-18
Location : taunton
Auto-Sleeper Model : kemerton xl
Vehicle Year : 2019
Re: Kemerton xl making improvements
![]() by glyne lock Tue Jan 02, 2024 7:33 pm
by glyne lock Tue Jan 02, 2024 7:33 pm
so to help any person wanting to do this modglyne lock wrote:When parked up and the wind was blowing at the side of the van the cold air was coming in from the lovely vent behind the microwave
I have now put a stop to that and the problem of wet coming in the vent
The vent is sealed over and I have put vents above the microwave
So 2 problems solved the wet getting in and cold and damp air
The microwave will now blow the air from the fan and come out the vents I have fitted [You must be registered and logged in to see this link.]
the fan below the microwave has 2 screws at the front remove them
the section will now fold down and can be removed
a second section will also fold down and can be removed
now you can get to the 4 screws to remove the fan section and pull the wire down from the section above to rest the fan on the cooker
now you can get to the blanks to remove the 4 screws holding the microwave
next pull the microwave out then put it back in but with the side first and the back facing the mains cable switch side
now you have 2 hands to unplug the mains
then you can remove and place the microwave out the way to start the mod
now i drilled the holes for the new vents after the old saying measure twice cut once
i now sealed the holes to seal the timber then i sealed the out side vent but around the inside
i then sealed the edge of the vent to put the blank in place
when the sealant had gone off ref the next day i put more sealant around the blank
i now fitted the new vents and put a small bit of sealant to help hold in place
i put insulation in the vent area and a blank around the timber cut out
now the microwave refit first putting in side end first to connect the mains plug
then take out and refit to correct position refit screws to secure and fit blanks
next hold fan in position but push cables back then refit the 4 screws
as its all apart the filter was cleaned ready to refit. so refit the 2 sections and the 2 securing screws
now when the wind blows at that side the camper will stay warmer and water will not come in the vent or the insect you get come in
from out side as can be seen from my picture all looks the same
hope this helps anybody wanting to do this mod
glyne lock- Member
-
Posts : 1810
Joined : 2019-10-18
Location : taunton
Auto-Sleeper Model : kemerton xl
Vehicle Year : 2019
Re: Kemerton xl making improvements
![]() by glyne lock Thu Jan 25, 2024 6:05 pm
by glyne lock Thu Jan 25, 2024 6:05 pm
After removing the connector you can see the cable was much to long to fit in the connection
This is a example of the reason people have problems with the electrics on there camper
glyne lock- Member
-
Posts : 1810
Joined : 2019-10-18
Location : taunton
Auto-Sleeper Model : kemerton xl
Vehicle Year : 2019
Re: Kemerton xl making improvements
![]() by Relaxez-Vous Wed Jun 12, 2024 10:48 pm
by Relaxez-Vous Wed Jun 12, 2024 10:48 pm
I wasn't sure how the damp got there, perhaps I'd been less than careful with a hosepipe and water had got in through the microwave vent. From Glyne's work it seemed sensible to exclude this vent as a possible source of water ingress.
The cooker fan unit was removed followed by the microwave. Our Russell Hobbs microwave is mounted on a separate piece of vinyl covered chipboard and it took me a while to discover which holes contained a screw for me to remove. So our microwave comes out attached to its board.
There was no damp behind the microwave but there was evidence of rust on a grill at the back of the microwave.

I covered the rear of the microwave vent with a circle of plastic which just fits inside the vent and used silicone mastic to make things water tight. Here is how it looks

Our drive means that the rear of our Kemerton XL is lower at the rear, the damp seemed to be confined mostly to a line corresponding to a valley in the floor between ridges. To dry the floor I remove the rear aluminum capping strip and raised the vinyl a tad and directed a 1000W fan heated on the ares of greatest damp. Gradually I moved the fan heated towards the rear doors which seemed to drive the moisture to the edge of the plywood floor. Fingers crossed I hope I've got this sorted.

Relaxez-Vous- Member
-
Posts : 1104
Joined : 2019-08-10
Location : Yorkshire
Auto-Sleeper Model : Kemerton XL
Vehicle Year : 2019
glyne lock likes this post
Page 7 of 7 • 1, 2, 3, 4, 5, 6, 7
» Harmony improvements for 2018
» T5 Topaz Modifications & Improvements
» Making a 2 into a 4?
» Kemerton
The Auto-Sleeper Motorhome Owners Forum (ASOF) :: Auto-Sleeper Motorhome Forums :: Auto-Sleeper "Van Conversions" Forum