
Repair of Washroom Window Surround
The Auto-Sleeper Motorhome Owners Forum (ASOF) :: Auto-Sleeper Motorhome Forums :: Auto-Sleeper "Van Conversions" Forum

 Repair of Washroom Window Surround
![]() by peugeotboxer Mon Apr 29, 2013 8:58 pm
by peugeotboxer Mon Apr 29, 2013 8:58 pm
Age has made the plastic very brittle, however, on removing the surround it became apparent that the reason the plastic had split, was the fact that the washroom walls had 'bowed' or 'curved' over time.
As the surround was fixed to the wall, this became under stress and the plastic split.
By fitting wooden battens to all four sides of the aperture, this made it more rigid and straightened the wall panels.
The battens were glued and screwed apart from the left side batten which was glued only.
CT1 was used for all sealing. [You must be registered and logged in to see this link.]
The surround was repaired using plastic filler with a thin metal repair mesh behind for strength.
I also used the mesh behind the splits on the surround as well.
Sorry for no photos of that, they somehow disappeared off the camera!
[You must be registered and logged in to see this link.]
Remove the white screw caps and remove the fixing screws. Ignore the black tape on the outside of the window. That was a temporary fix to stop the ingress of water. Glass rubber now sealed.
[You must be registered and logged in to see this link.]
One of many splits.
[You must be registered and logged in to see this link.]
Remove silicone sealer.
[You must be registered and logged in to see this link.]
Gently pull surround away.
[You must be registered and logged in to see this link.]
Gently pull surround away.
[You must be registered and logged in to see this link.]
Surround now detached.
[You must be registered and logged in to see this link.]
Aperture exposed.
[You must be registered and logged in to see this link.]
Surround removed.
[You must be registered and logged in to see this link.]
Edging of surround repaired with 'Isopon Plastic Filler' from Halfords. Thin metal mesh (Halfords) used to reinforce repair.
Splits in surround repaired the same way, using metal mesh behind to reinforce.
[You must be registered and logged in to see this link.]
Clean out silicone sealer.
How on earth did that fly get there? Did it get in at the factory?
[You must be registered and logged in to see this link.]
Clean out silicone sealer.
[You must be registered and logged in to see this link.]
Fix wooden batten to all four sides of aperture.
[You must be registered and logged in to see this link.]
Fix wooden batten to all four sides of aperture.
[You must be registered and logged in to see this link.]
Fixing wooden batten to right hand side of aperture.
[You must be registered and logged in to see this link.]
Fixing wooden batten to left side of aperture. Glued in place as screws would not be hidden by surround.
[You must be registered and logged in to see this link.]
Clamped in place until adhesive set.
[You must be registered and logged in to see this link.]
Sprayed with white plastic primer and then gloss Appliance White (Halfords).
Refitted to washroom wall.
Slightly longer screws used on account that wall is now straight as opposed to 'curved'.
White sealer used around glass/surround.
Pretty pleased with the end result, time will tell.......................
peugeotboxer- Donator

-

Posts : 2847
Joined : 2011-06-23
Location : Somerset
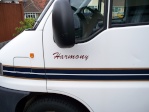
Auto-Sleeper Model : Harmony
Vehicle Year : 2000
Island_Resident likes this post
Re: Repair of Washroom Window Surround
![]() by Stewart John Mon Apr 29, 2013 9:29 pm
by Stewart John Mon Apr 29, 2013 9:29 pm
Top job youth.


I also have a crack split on the same panel on the right side.
_________________
Stewart

Stewart John- Donator
-
Posts : 362
Joined : 2012-01-14
Member Age : 77
Location : Loughborough
Auto-Sleeper Model : Topaz 2.0 2014
Re: Repair of Washroom Window Surround
![]() by boxerman Mon Apr 29, 2013 9:54 pm
by boxerman Mon Apr 29, 2013 9:54 pm

I think that should be in the "factsheets" section.
Frank

boxerman- Donator
-
Posts : 4491
Joined : 2011-08-21
Member Age : 77
Location : Preston Lancs
Auto-Sleeper Model : '95 Symphony
Vehicle Year : 1995
Re: Repair of Washroom Window Surround
![]() by modelman Tue Apr 30, 2013 7:50 am
by modelman Tue Apr 30, 2013 7:50 am
Great job, its nice to see a project done properly, you shouldn't have any more issues there.
_________________
I DO have to grow old, I DO NOT have to grow up!

modelman- Donator
-
Posts : 5313
Joined : 2011-09-16
Member Age : 78
Location : Barnsley,S/Yorks
Auto-Sleeper Model : Amethyst
Vehicle Year : 2003
Re: Repair of Washroom Window Surround
![]() by deckie Tue Apr 30, 2013 7:57 am
by deckie Tue Apr 30, 2013 7:57 am
Nice one, PB
Brian
_________________
Old age is when your classmates are so Grey, Wrinkled and Bald that they don't recognize you
deckie- Donator
-
Posts : 3085
Joined : 2011-06-02
Member Age : 79
Location : Folkestone
Auto-Sleeper Model : Clubman GL
Re: Repair of Washroom Window Surround
![]() by whisky Tue Apr 30, 2013 8:06 am
by whisky Tue Apr 30, 2013 8:06 am
Fantastic. Whisky.

_________________
Only two things are infinite. The Universe and Mans Stupidity.

whisky- Member

-
Posts : 2196
Joined : 2011-05-03
Location : Mansfield. Nottingham
Auto-Sleeper Model : Executive
Re: Repair of Washroom Window Surround
![]() by peugeotboxer Tue Apr 30, 2013 2:57 pm
by peugeotboxer Tue Apr 30, 2013 2:57 pm
(Of course, it could have turned out horribly wrong!!)

PB
peugeotboxer- Donator
-
Posts : 2847
Joined : 2011-06-23
Location : Somerset
Auto-Sleeper Model : Harmony
Vehicle Year : 2000
Re: Repair of Washroom Window Surround
![]() by Harper22 Sun May 19, 2013 9:37 am
by Harper22 Sun May 19, 2013 9:37 am
 I need to do the rear door panels and the kitchen window panel as all of them have split in the corners, I was wondering how to go about this little job and you sir have made my day finding this post thank you
Harper22- Member
-
Posts : 333
Joined : 2012-06-09
Member Age : 45
Location : sheffield
Auto-Sleeper Model : Harmony
Re: Repair of Washroom Window Surround
![]() by Paulmold Sun May 19, 2013 9:48 am
by Paulmold Sun May 19, 2013 9:48 am
Harper22 wrote:the rear door panels and the kitchen window panel as all of them have split in the corners,
Mine are exactly the same, all panels affected. The splits were there when I bought it and they will probably be there when I sell it. Obviously a poor design and possibly caused by over-tightening the screws at production.

Paulmold- Donator
-
Posts : 26677
Joined : 2011-02-21
Member Age : 73
Location : North East Wales
Auto-Sleeper Model : Sussex Duo
Vehicle Year : 2010
Re: Repair of Washroom Window Surround
![]() by Harper22 Sun May 19, 2013 9:56 am
by Harper22 Sun May 19, 2013 9:56 am
Paulmold wrote:Harper22 wrote:the rear door panels and the kitchen window panel as all of them have split in the corners,
Mine are exactly the same, all panels affected. The splits were there when I bought it and they will probably be there when I sell it. Obviously a poor design and possibly caused by over-tightening the screws at production.
Yeh mine were like it when i bought her too, Its almost like the plastic has shrunk in the corners
 but i shall definately be having a go at fixing them now although it may mean a change of colour to the surrounds as mine are a dark cream (guessing were off white at time of build)
Harper22- Member
-
Posts : 333
Joined : 2012-06-09
Member Age : 45
Location : sheffield
Auto-Sleeper Model : Harmony
Re: Repair of Washroom Window Surround
![]() by Bartfarst Sun Aug 18, 2013 9:16 pm
by Bartfarst Sun Aug 18, 2013 9:16 pm
Paul,Paulmold wrote:Mine are exactly the same, all panels affected. The splits were there when I bought it and they will probably be there when I sell it. Obviously a poor design and possibly caused by over-tightening the screws at production.Harper22 wrote:the rear door panels and the kitchen window panel as all of them have split in the corners,
I think over-tightening of screws may be a factor. However I feel AS's long term problem has been reliance upon insuficiently strong vacuum mouldings in many areas. For those unfamiliar with the technique, vacuum moulding involves heating a sheet of polymer until it softens then drawing it over a former whilst subjecting the sheet to vacuum, thus the 2D sheet takes on the 3D shape of the former. The problem with this and many other forming processes is that at certain points the sheet has to stretch to take on the shape of the former. In some areas this stretching happens more than others and also in both axes, the result being excessive localised thinning and hence reduced strength.
So whilst the general sheet thickness may be fine, locally the moulded form will be significantly weeker. Add to this some embrittlement over time, presumably as a result of exposure to UV radiation, and cracking is the result. Virtually every internal moulded panel on my 1995 Harmony is suffering in some way or another.
My recovery action has been to reinforce the reverse side with glass fibre tape and epoxy resin which seems to work reasonably well.
Bartfarst

Bartfarst- Member
-
Posts : 886
Joined : 2011-04-08
Member Age : 66
Location : Redditch, Worcs.
Auto-Sleeper Model : 1995 Boxer Harmony
Vehicle Year : 1995
Re: Repair of Washroom Window Surround
![]() by RichardB Sat Jan 18, 2014 6:23 pm
by RichardB Sat Jan 18, 2014 6:23 pm
Made a start on repairing my washroom window surround this afternoon.
It was all going rather well..
Took off the plastic frame and repaired a few cracks and added some strengtheners around the screw holes, sprayed it white and its ready to go back on.
Was going to add the battens around the window but after removing the plastic frame found that there was already some there - not sure if this is standard on the Harmony or someone else has already done it.
Then as usually, disaster - the ply around the window frame had some water marks on it but looked as if they had dried out - just to be sure I put the hose pipe on it and there is a small drip of water coming through...
So the next job will be to reseal the window - From what I can see it screws on from the outside, so the plan is to remove it, reseal and refit.
I have some White Sikaflex to do it with but also have some of the proper strip sealant that I got from auto sleepers to fix the other high top windows - I am thinking of using this stuff, screwing the window back in and then a bead of black sikaflex round it outside...
Has anyone removed or replaced a washroom window, and what would you use or recommend to refit? The proper stuff or just stick it in with white sikaflex?
Cheers
richard

RichardB- Member
-
Posts : 150
Joined : 2013-08-11
Member Age : 54
Location : East Riding of Yorkshire
Auto-Sleeper Model : Not at the moment...
Vehicle Year : n/a
Re: Repair of Washroom Window Surround
![]() by peugeotboxer Sat Jan 18, 2014 7:25 pm
by peugeotboxer Sat Jan 18, 2014 7:25 pm
I personally would not use the sealant strip. Sikaflex it back in. It's not going to go anywhere!
I stuck a high top window in on mine.
With regards to the battens, maybe someone modded yours previously or none were ever fitted to mine in build!
PB
peugeotboxer- Donator
-
Posts : 2847
Joined : 2011-06-23
Location : Somerset
Auto-Sleeper Model : Harmony
Vehicle Year : 2000
Re: Repair of Washroom Window Surround
![]() by -mojo- Sat Jan 18, 2014 8:00 pm
by -mojo- Sat Jan 18, 2014 8:00 pm
The great thing about the butyl rubber sealant is that you put it on, tighten up the fixings, leave for a few days for excess to squeeze out and then run a blunt knife round to cut it back, making a very neat finish. Then run a fine bead of silicone sealant or Sikaflex round the join and you're done.

-mojo-- Member
-
Posts : 4566
Joined : 2012-08-04
Member Age : 24
Location : Southeast
Auto-Sleeper Model : Trooper
Vehicle Year : 2006
» Cracked Shower Room Plastic Window Trim
» cracking window surround
» Replacement Window Surround/Blinds
» Symbol Washroom Window
The Auto-Sleeper Motorhome Owners Forum (ASOF) :: Auto-Sleeper Motorhome Forums :: Auto-Sleeper "Van Conversions" Forum