
Removal of Awning Light
3 posters
The Auto-Sleeper Motorhome Owners Forum (ASOF) :: Auto-Sleeper Motorhome Forums :: Auto-Sleeper "Van Conversions" Forum
Page 1 of 1

 Removal of Awning Light
![]() by Sleepy Thu Oct 17, 2019 3:45 pm
by Sleepy Thu Oct 17, 2019 3:45 pm
Hi,
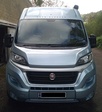
can anyone tell me how to remove the light above the sliding door?
I can see that there is some water inside, and am hoping I can take it off and re-seal it.
It is on a 2013 Symbol, but I guess the same light is used on other vans of a similar age.
See photo...
Thanks.
can anyone tell me how to remove the light above the sliding door?
I can see that there is some water inside, and am hoping I can take it off and re-seal it.
It is on a 2013 Symbol, but I guess the same light is used on other vans of a similar age.
See photo...
Thanks.

Sleepy- Member

-

Posts : 85
Joined : 2013-12-28
Member Age : 70
Location : Reading, Berks
Auto-Sleeper Model : Symbol
Vehicle Year : 2012
Re: Removal of Awning Light
![]() by Dbvwt Thu Oct 17, 2019 4:15 pm
by Dbvwt Thu Oct 17, 2019 4:15 pm
I’ve got a later Symbol so a slightly different light (and possibly a different fixing method) but I simply unscrewed mine, it was a 2 minute job.
It was to clean underneath before running a bead of silicone sealant on the top edge as it dripped on the single seat with the door open in the wet.
It was to clean underneath before running a bead of silicone sealant on the top edge as it dripped on the single seat with the door open in the wet.

Dbvwt- Member
-
Posts : 3205
Joined : 2018-10-04
Location : Aylesbury
Auto-Sleeper Model : Symbol
Vehicle Year : 2018
Re: Removal of Awning Light
![]() by Sleepy Thu Oct 17, 2019 6:44 pm
by Sleepy Thu Oct 17, 2019 6:44 pm
Thanks for the reply - where did it unscrew? There are no visible screws on the outside, and I don't want to start taking the interior trim off unless I have to.
_________________
Auto-Sleeper Symbol - Peugeot Boxer MWB
Sleepy- Member
-
Posts : 85
Joined : 2013-12-28
Member Age : 70
Location : Reading, Berks
Auto-Sleeper Model : Symbol
Vehicle Year : 2012
Re: Removal of Awning Light
![]() by Dbvwt Thu Oct 17, 2019 6:49 pm
by Dbvwt Thu Oct 17, 2019 6:49 pm
To be honest I can’t remember but it wasn’t difficult so I’m guessing on top.
Have you been on steps and had a look? Can have a look in the morning if it helps.
Have you been on steps and had a look? Can have a look in the morning if it helps.
Dbvwt- Member
-
Posts : 3205
Joined : 2018-10-04
Location : Aylesbury
Auto-Sleeper Model : Symbol
Vehicle Year : 2018
Re: Removal of Awning Light
![]() by Sleepy Thu Oct 17, 2019 7:14 pm
by Sleepy Thu Oct 17, 2019 7:14 pm
Nothing on top... I guess we have different fixings. I think it is probably something to do with the plastic bits at each end on my light - probably easy to take apart if I lever in the right place and easy to break if I don't!
_________________
Auto-Sleeper Symbol - Peugeot Boxer MWB
Sleepy- Member
-
Posts : 85
Joined : 2013-12-28
Member Age : 70
Location : Reading, Berks
Auto-Sleeper Model : Symbol
Vehicle Year : 2012
Re: Removal of Awning Light
![]() by Kemerton-bath Thu Oct 17, 2019 8:13 pm
by Kemerton-bath Thu Oct 17, 2019 8:13 pm
We had an identical light on our 2009 Symbol. It's a Labcraft Astro. Our Kemerton came with one and we instructed the dealer to replace it when we purchased the van, as several of the LEDs were defective and there were signs of moisture inside. They replaced it with another Astro, but once we had the van a year I replaced it with a Dometic Raintec LED strip, which is what AS now fit to all their panel vans. The Raintec spans just a bit more than the full width of the sliding door and thereby acts as a drip rail, as well as being a tidier looking unit.
Having removed the Astro and had it in pieces I can give you chapter and verse on the subject! The LED strip itself is contained within a clear rigid plastic channel, the ends of which are sealed with clear silicon, and this is the weak link. The silicon eventually breaks down and allows water ingress onto the LED strip. Given the exposed position of the Astro it's more than likely that moisture is driven into the unit at its front-facing end.
You may well find that the Astro proves difficult to remove. When I came to replace it with the Raintec I discovered that the dealer we bought our van from had siliconed it onto the bodywork and it wasn't easy getting it off without scratching the bodywork. I imagine AS do likewise, as the only way of sealing the hole into the van for the wiring. My advice is to attempt to dry out the Astro in situ, then reseal the ends of the clear plastic channel. These ends are exposed by removing the curved plastic end-covers, achieved by sliding them away from the LED strip, in the same plane - i.e., slide the left cover towards the front of the van and the right cover towards the rear. They should come off quite easily unless trapped by a stray blob of silicon from when the light fitting was installed.
With the end covers off I would try gently warming the strip light with a hair dryer to evaporate the trapped moisture. If this is successful, re-seal the ends of the plastic channel with silicon and once cured, slide the covers back into place. If you do need to remove the fitting from the van then best get back to me and I can offer further advice.
As a final note, although the Raintec looks superior, I had a few of its LEDs fail with a few months of fitting it. I'd purchased it though AS (interestingly at a considerably cheaper price than anywhere else) who agreed to replace the LED strip under warranty.
Hope you manage to cure the problem.
Tim
_________________
Previously symbol-bath
1996 - Autosleeper Symphony 2010 - Autosleeper Symbol 2018 - Autosleeper Kemerton 2023 - Autosleeper Kemerton XL (Fiat)
Kemerton-bath- Donator

-
Posts : 1174
Joined : 2013-01-06
Member Age : 65
Location : Bath
Auto-Sleeper Model : Kemerton XL (Fiat)
Vehicle Year : 2020
Re: Removal of Awning Light
![]() by Dbvwt Thu Oct 17, 2019 8:14 pm
by Dbvwt Thu Oct 17, 2019 8:14 pm
Edit....post deleted due to the thorough explanation above posted at the same time
Last edited by Dbvwt on Thu Oct 17, 2019 8:17 pm; edited 2 times in total
Dbvwt- Member
-
Posts : 3205
Joined : 2018-10-04
Location : Aylesbury
Auto-Sleeper Model : Symbol
Vehicle Year : 2018
Re: Removal of Awning Light
![]() by Kemerton-bath Thu Oct 17, 2019 8:16 pm
by Kemerton-bath Thu Oct 17, 2019 8:16 pm
Further to the above, sadly the fixing screws aren't exposed upon removing the end covers, but only when the LED strip unit has been slide partially out of the casing.
_________________
Previously symbol-bath
1996 - Autosleeper Symphony 2010 - Autosleeper Symbol 2018 - Autosleeper Kemerton 2023 - Autosleeper Kemerton XL (Fiat)
Kemerton-bath- Donator
-
Posts : 1174
Joined : 2013-01-06
Member Age : 65
Location : Bath
Auto-Sleeper Model : Kemerton XL (Fiat)
Vehicle Year : 2020
Re: Removal of Awning Light
![]() by Sleepy Fri Oct 18, 2019 11:44 am
by Sleepy Fri Oct 18, 2019 11:44 am
Thanks Tim, that was really helpful.
I now have the ends off; though I damaged both clips getting them off. I would only add one thing, that it looks like there is a clip that needs to be released by pushing something into the little rectangular hole at each end... unfortunately just as you suggested there was silicone in this area which meant they were effectively glued in, and broke off.
I will probably try an in-situ repair pending a new light.
BTW our attention was drawn to this by some drips of water coming into the van. Just the once, and we were parked facing (steeply) downhill, so I guess that the light-to-body seal has also failed and water flows in if facing downhill - fortunately it doesn't when parked on the flat or driving in the rain.
Seems there is too much silicone where it shouldn't be and not enough where it is needed -
_________________
Auto-Sleeper Symbol - Peugeot Boxer MWB
Sleepy- Member
-
Posts : 85
Joined : 2013-12-28
Member Age : 70
Location : Reading, Berks
Auto-Sleeper Model : Symbol
Vehicle Year : 2012
Re: Removal of Awning Light
![]() by Kemerton-bath Fri Oct 18, 2019 5:46 pm
by Kemerton-bath Fri Oct 18, 2019 5:46 pm
Assuming your in-situ repair is successful and depending on how broken the end-covers are, you may be able to still use them by re-attaching them with silicon. Regarding the water ingress into the van, the Astro requires 3 holes (2 for self-tapping screw fixings and 1 for the cable), and on the Kemerton the cable hole was towards the front end. So it's possible that water came into your van having pooled on top of the (poorly sealed) Astro and worked its way through the cable hole when the van was pointing downhill. That's bad luck given how small the hole is (4mm or so) but at least it showed up a problem that you can almost certainly solve by running a bead of silicon around the Astro's casing.
Kaspian on the forum sadly knows all too well about inept silicon sealing by AS on his Kemerton and has documented his experience on here.
Tim
Kaspian on the forum sadly knows all too well about inept silicon sealing by AS on his Kemerton and has documented his experience on here.
Tim
_________________
Previously symbol-bath
1996 - Autosleeper Symphony 2010 - Autosleeper Symbol 2018 - Autosleeper Kemerton 2023 - Autosleeper Kemerton XL (Fiat)
Kemerton-bath- Donator
-
Posts : 1174
Joined : 2013-01-06
Member Age : 65
Location : Bath
Auto-Sleeper Model : Kemerton XL (Fiat)
Vehicle Year : 2020
Re: Removal of Awning Light
![]() by Sleepy Sun Oct 20, 2019 10:23 am
by Sleepy Sun Oct 20, 2019 10:23 am
That's exactly what I plan to do as a temporary fix, on the next dry day which doesn't look like today....
Achieving a waterproof seal with silicone demands very good workmanship; and silicone is only designed for a finite service life which is typically 5-20 years depending on type. IMHO not really the right material to seal a light to a vehicle body!
Achieving a waterproof seal with silicone demands very good workmanship; and silicone is only designed for a finite service life which is typically 5-20 years depending on type. IMHO not really the right material to seal a light to a vehicle body!
_________________
Auto-Sleeper Symbol - Peugeot Boxer MWB
Sleepy- Member
-
Posts : 85
Joined : 2013-12-28
Member Age : 70
Location : Reading, Berks
Auto-Sleeper Model : Symbol
Vehicle Year : 2012
Re: Removal of Awning Light
![]() by Kemerton-bath Sun Oct 20, 2019 10:47 am
by Kemerton-bath Sun Oct 20, 2019 10:47 am
I agree, and having learned of experiences like yours I check all silicon sealing on the van whenever I wash it. For small repairs I use a low or medium modulus sealant, from the Dow & Corning range.
Tim
Tim
_________________
Previously symbol-bath
1996 - Autosleeper Symphony 2010 - Autosleeper Symbol 2018 - Autosleeper Kemerton 2023 - Autosleeper Kemerton XL (Fiat)
Kemerton-bath- Donator
-
Posts : 1174
Joined : 2013-01-06
Member Age : 65
Location : Bath
Auto-Sleeper Model : Kemerton XL (Fiat)
Vehicle Year : 2020
Re: Removal of Awning Light
![]() by Sleepy Tue Feb 11, 2020 4:18 pm
by Sleepy Tue Feb 11, 2020 4:18 pm
Well this dropped out of sight on the to-do list but has now resurfaced. So I now have the LED strip out, in pieces and drying ready to be re-sealed up. Having taken the LED strip out, I see that there are in fact FOUR holes in the alloy mount: 2 for fixing screws, one for the wires and another near the middle which doesn't seem to be used for anything. Maybe this is where the water originally got in, I will seal that up too.
I have called Labtec to ask about the price of a new LED strip - may go down that route as the old strip has some cracks in it as well as failed seals.
I have called Labtec to ask about the price of a new LED strip - may go down that route as the old strip has some cracks in it as well as failed seals.
_________________
Auto-Sleeper Symbol - Peugeot Boxer MWB
Sleepy- Member
-
Posts : 85
Joined : 2013-12-28
Member Age : 70
Location : Reading, Berks
Auto-Sleeper Model : Symbol
Vehicle Year : 2012
» Removal of back light cover
» Removal of Fiamma Canopy / Awning
» Windsor rear wheel removal - How ??
» Awning light
» Remis roof light plastic canopy removal
» Removal of Fiamma Canopy / Awning
» Windsor rear wheel removal - How ??
» Awning light
» Remis roof light plastic canopy removal
The Auto-Sleeper Motorhome Owners Forum (ASOF) :: Auto-Sleeper Motorhome Forums :: Auto-Sleeper "Van Conversions" Forum
Page 1 of 1
Permissions in this forum:
You cannot reply to topics in this forum