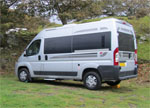
Autosleeper Stratford modifications Part 2
+2
Campievanner
Dolwen
6 posters
The Auto-Sleeper Motorhome Owners Forum (ASOF) :: Auto-Sleeper Motorhome Forums :: Auto-Sleeper "Van Conversions" Forum
Page 1 of 1
 Autosleeper Stratford modifications Part 2
I’ve been at it again, fiddling with the Stratford. The other half has started calling me Wesley Pegden, as something has moved or changed every time he gets in it!
Pics of the latest modifications can be seen by clicking on the link below. (Click next to advance the photos in order)
[You must be registered and logged in to see this link.]
or to see all the photos including previous ones, click the WWW below my avatar.
1) I fitted a 70W GB-SOL semi flexible solar panel. The procedure is based on John Wickersham’s instructions in the latest edition of the Haynes Motorcaravan Manual, & I actually used the same make of solar panel.
The panel was bonded to the roof ridges using white Sikaflex 512 caravan sealant/adhesive. The van paint was lightly scuffed with 300 grit wet & dry to provide a key where adhesive was applied. The cable was run through the nearside b-pillar, behind the (former) microwave housing, then behind the sink splashback trim panel, into the void behind the kitchen unit, through the floor then protected with convoluted plastic tubing and routed under the van towards the battery compartment, back up through the floor to the regulator which was fitted near the battery. This solar panel is probably one of the most expensive you can get for a given wattage but it makes for a neat & descrete installation & fits exactly in the only space available on the Stratford’s roof, (& it’s made in Wales ).
).
A solar panel works really well in conjunction with a compressor fridge (which we found is the biggest drain on the leisure batteries in our van) as it provides the most power exactly when the fridge is working hardest, i.e on hot sunny days.
2) The Autosleeper cab seat covers have gone. The original peugeot van seats look much more in keeping with the cab area & the Autosleeper covers never looked like they fitted properly!
3) The truma heater controls have been moved so we can lounge on the sofa without them digging into our backs & being inadvertantly adjusted (or knocked off which happened a couple of times!)
4) Extra 230V socket added to the right of the kitchen unit.
5) Large table now ditched completely & I fitted a table leg socket in the floor between the sofas & reintroduced the intermediate sized cab table we originally ditched for use as the main table, this now stores neatly behind the driver seat in the same holders I fitted for the large table & the leg stores in the corner of the toilet compartment. The socket attached to the table was refitted off-centre so the table is multi adjustable.
6) The small rear sliding table is now removable (original sliding clip simply unscrewed & relocated) and an additional bar added to the left of the kitchen unit to clip it onto, this gives extra kitchen work surface. This table now stores on the shelf in the wardrobe.
7) Microwave removed!
8) Fiamma wind deflector fitted to front roof vent.
I’m running out of things to do now!
Pics of the latest modifications can be seen by clicking on the link below. (Click next to advance the photos in order)
[You must be registered and logged in to see this link.]
or to see all the photos including previous ones, click the WWW below my avatar.
1) I fitted a 70W GB-SOL semi flexible solar panel. The procedure is based on John Wickersham’s instructions in the latest edition of the Haynes Motorcaravan Manual, & I actually used the same make of solar panel.
The panel was bonded to the roof ridges using white Sikaflex 512 caravan sealant/adhesive. The van paint was lightly scuffed with 300 grit wet & dry to provide a key where adhesive was applied. The cable was run through the nearside b-pillar, behind the (former) microwave housing, then behind the sink splashback trim panel, into the void behind the kitchen unit, through the floor then protected with convoluted plastic tubing and routed under the van towards the battery compartment, back up through the floor to the regulator which was fitted near the battery. This solar panel is probably one of the most expensive you can get for a given wattage but it makes for a neat & descrete installation & fits exactly in the only space available on the Stratford’s roof, (& it’s made in Wales
 ).
).A solar panel works really well in conjunction with a compressor fridge (which we found is the biggest drain on the leisure batteries in our van) as it provides the most power exactly when the fridge is working hardest, i.e on hot sunny days.
2) The Autosleeper cab seat covers have gone. The original peugeot van seats look much more in keeping with the cab area & the Autosleeper covers never looked like they fitted properly!
3) The truma heater controls have been moved so we can lounge on the sofa without them digging into our backs & being inadvertantly adjusted (or knocked off which happened a couple of times!)
4) Extra 230V socket added to the right of the kitchen unit.
5) Large table now ditched completely & I fitted a table leg socket in the floor between the sofas & reintroduced the intermediate sized cab table we originally ditched for use as the main table, this now stores neatly behind the driver seat in the same holders I fitted for the large table & the leg stores in the corner of the toilet compartment. The socket attached to the table was refitted off-centre so the table is multi adjustable.
6) The small rear sliding table is now removable (original sliding clip simply unscrewed & relocated) and an additional bar added to the left of the kitchen unit to clip it onto, this gives extra kitchen work surface. This table now stores on the shelf in the wardrobe.
7) Microwave removed!
8) Fiamma wind deflector fitted to front roof vent.
I’m running out of things to do now!


Dolwen- Member

-

Posts : 18
Joined : 2011-09-14
Member Age : 49
Location : Wales
Auto-Sleeper Model : Stratford
 Re: Autosleeper Stratford modifications Part 2
You can come and change ours too :)
We too ditched the table but we cut a small one (as the cab mounted one) from our old table, bought a Fiamma plastic tripod and trimmed the leg ends. The table stores in the wardrobe in its proper mounting and the tripod in the bathroom.
We too ditched the table but we cut a small one (as the cab mounted one) from our old table, bought a Fiamma plastic tripod and trimmed the leg ends. The table stores in the wardrobe in its proper mounting and the tripod in the bathroom.

Campievanner- Member

-

Posts : 380
Joined : 2012-02-20
Location : Manchester
Auto-Sleeper Model : Stratford
Vehicle Year : 2012
 Re: Autosleeper Stratford modifications Part 2
A very nice van & a lot of very nice mods there Dolwen, what is there for you do 'do' next I wonder

_________________
I DO have to grow old, I DO NOT have to grow up!

modelman- Donator

-

Posts : 5313
Joined : 2011-09-16
Member Age : 78
Location : Barnsley,S/Yorks
Auto-Sleeper Model : Amethyst
Vehicle Year : 2003
 Re: Autosleeper Stratford modifications Part 2
Hi Dolwen
I can think of one modification I would love to see you do. You put a great deal of such good work into your mods (we have all seen really dire examples on pre loved vans)
To fit the rear windows blinds as in the Kemerton on.
We are thinking of doing this and wonder what people think. Mainly would it be too dark ? although the rear curtains are a little naff really. We would look at fitting an extra board to make it look flush and the correct fabric.
We saw a pre loved Warwick on a dealers site for sale that had this mod done but couldn't really see how well it worked.
I know how much the blinds are from AS as I rang them up even have the part numbers at work on a jotter And the black surrounds they say you need too although wondered if this could be achieved with wood instead.
We looked at a Kemerton at Newark show and tried to work it out but hard to do with dealers on the prowl.
Anyone else thought about this ? The thing to work out is that the door angles on the inside.

Campievanner- Member

-

Posts : 380
Joined : 2012-02-20
Location : Manchester
Auto-Sleeper Model : Stratford
Vehicle Year : 2012
 Re: Autosleeper Stratford modifications Part 2
Hi Campievanner,
Yes those awful rear curtains. We too have been looking at various options for fitting blinds to the rear doors. We looked at the Kemerton rear blinds & like the idea but think it might look a bit too much like a stuck on afterthought in the Stratford's lounge (it's fine in the Kemerton's washroom where it's not visible most of the time). It''l be something to ponder over the Jubilee weekend as we sit in the lounge, looking out at the rain no doubt!
..& a tripod for the table's a great idea & would mean we can use it outside, something else to add to the shopping list!
Thanks for the comments modelman.
Yes those awful rear curtains. We too have been looking at various options for fitting blinds to the rear doors. We looked at the Kemerton rear blinds & like the idea but think it might look a bit too much like a stuck on afterthought in the Stratford's lounge (it's fine in the Kemerton's washroom where it's not visible most of the time). It''l be something to ponder over the Jubilee weekend as we sit in the lounge, looking out at the rain no doubt!

..& a tripod for the table's a great idea & would mean we can use it outside, something else to add to the shopping list!
Thanks for the comments modelman.

Dolwen- Member

-

Posts : 18
Joined : 2011-09-14
Member Age : 49
Location : Wales
Auto-Sleeper Model : Stratford
 Re: Autosleeper Stratford modifications Part 2
Hi Dolwen.. Im a big fan of yr modifications, and i am constantly tinkering with my own Stratford, but mainly on the interior furniture side of the van.. I notice yr latest flicker photographs now include the re-location of yr cooker and fridge, and the inclusion of a longer seating area.. What was the thinking/motive behind this (if you don't mind me asking ?)
Thanks Ian
Thanks Ian

snoman- Member

-

Posts : 34
Joined : 2011-09-20
Member Age : 60
Location : Tynemouth
Auto-Sleeper Model : 2011 Stratford
Vehicle Year : 2011
 Re: Autosleeper Stratford modifications Part 2
Note the previous post was three years ago.
Peter
Peter
_________________
Peter #1

Peter Brown- Donator

-

Posts : 10637
Joined : 2012-11-10
Member Age : 72
Location : Staffs
Auto-Sleeper Model : Broadway EB
Vehicle Year : 2016
 Re: Autosleeper Stratford modifications Part 2
Yes thanks Peter, I just thought he may still pop on now and again

snoman- Member

-

Posts : 34
Joined : 2011-09-20
Member Age : 60
Location : Tynemouth
Auto-Sleeper Model : 2011 Stratford
Vehicle Year : 2011
 Re: Autosleeper Stratford modifications Part 2
Does your Sony radio work with the steering wheel controls? The Peugeot radio with no bluetooth, usb or audio in is pretty rubbish.
_________________
Best wishes - Ron

inspiredron- Member

-

Posts : 3436
Joined : 2012-06-02
Member Age : 83
Location : Ellesmere, Shropshire
Auto-Sleeper Model : Lancashire
Vehicle Year : 2012
 Similar topics
» Autosleeper Stratford modifications
» Autosleeper stratford
» Kitchen tap on AutoSleeper Stratford
» Carver plug (Autosleeper part)
» Some modifications for van conversions
» Autosleeper stratford
» Kitchen tap on AutoSleeper Stratford
» Carver plug (Autosleeper part)
» Some modifications for van conversions
The Auto-Sleeper Motorhome Owners Forum (ASOF) :: Auto-Sleeper Motorhome Forums :: Auto-Sleeper "Van Conversions" Forum
Page 1 of 1
Permissions in this forum:
You cannot reply to topics in this forum