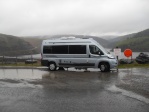
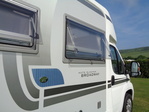
Auto-Sleeper Warwick Duo Modifications
+29
sidecutter
Jaytee
Biker51
suenmike
daisy mae
Scotty1
Infared
Gram
glynick
Tengah74
pjkxpjkx
chrisboyo
Spospe
Wigley Woggled
john.mcnamee
Paulmold
roli
squip
mccormw
Dolwen
boxerman
Campievanner
raptor37
Johnh
mondial
dandywarhol
Waves117
stevomar
nimbus
33 posters
The Auto-Sleeper Motorhome Owners Forum (ASOF) :: Auto-Sleeper Motorhome Forums :: Auto-Sleeper "Van Conversions" Forum
Page 3 of 3
Page 3 of 3 •  1, 2, 3
 Re: Auto-Sleeper Warwick Duo Modifications
Isn't this kit used when stowing an alloy wheel in the spare wheel position?
G
G

Gram- Member

-

Posts : 289
Joined : 2013-02-20
Member Age : 80
Location : Hants
Auto-Sleeper Model : Symbol
Vehicle Year : 2009
 Re: Auto-Sleeper Warwick Duo Modifications
For what it's worth the Peugeot toolbox from under the passenger seat fits snugly in the unused space on the nearside in front of the wheel arch. But probably not the best utilisation of space and a replacement hydraulic jack is a good substitute.

nimbus- Member

-

Posts : 227
Joined : 2011-03-07
Member Age : 83
Location : Bristol
Auto-Sleeper Model : Warwick Duo
 Re: Auto-Sleeper Warwick Duo Modifications
pjkxpjkx wrote:
Question which I think someone has already posted about but | cannot find it...
This is in the tool kit ( 2011 Peugeot Boxer) but was is it? RTFM no help.
[You must be registered and logged in to see this link.]
The bits in the tool kit form the adaptor to enable an alloy wheel to be winched up into the spare wheel storage position. In my opinion it will be easier to store a punctured wheel in the back, than mess about with the three bolts + the plate in order to take the tyre to be repaired. Unhelpfully, the driver's handbook makes no mention of this handy item, or its use.

Spospe- Donator

-

Posts : 1764
Joined : 2013-11-17
Member Age : 80
Location : South Manchester
Auto-Sleeper Model : Warwick Duo
Vehicle Year : 2014
 Re: Auto-Sleeper Warwick Duo Modifications
Thanks again
Pete
Pete

pjkxpjkx- Member

-

Posts : 252
Joined : 2012-12-14
Member Age : 76
Location : Hartlebury
Auto-Sleeper Model : Warwick Duo
 Re: Auto-Sleeper Warwick Duo Modifications
[You must be registered and logged in to see this link.]
2011 Warwick Duo
The old gas hose was starting to split at the tight bend at the regulator end
[You must be registered and logged in to see this link.]
The old one was 0.45 Metre rubber. The new one is 0.75 Metre stainles steel. Gaslow Part number 01-6020-SS £36.90 including carriage.
[You must be registered and logged in to see this link.]
Hopefully sorted...
[You must be registered and logged in to see this link.]
Pete

pjkxpjkx- Member

-

Posts : 252
Joined : 2012-12-14
Member Age : 76
Location : Hartlebury
Auto-Sleeper Model : Warwick Duo
 Re: Auto-Sleeper Warwick Duo Modifications
Whilst the kitchen worktop in a Warwick Duo is considered one of the largest in any panel van it's the only place close to 12v and 240v sockets and this is where I like to charge my electronic devices, much to my wife's annoyance when she is cooking! So I've used the rear folding table to extend the effective length of the worktop which is on folding hinges so that it can be folded down when not being used, although I suspect it will stay up most of the time.
The reason that I used the rear table was to match the laminate colour. I replaced the rear table with a wood effect laminate board from B&Q, shaped to match the original. I got the hinges on eBay which I think were about £8 a pair from Hong Kong.
It doesn't interfere with raising the bunk in either position of the table and in its raised position it sits just above the rear backrest cushion.
Here are a few photos -
[You must be registered and logged in to see this link.]

nimbus- Member

-

Posts : 227
Joined : 2011-03-07
Member Age : 83
Location : Bristol
Auto-Sleeper Model : Warwick Duo
 Rear curtains refitted
I have read this thread and am starting to implement some of the suggestions.
My contribution is to enable the rear curtains to close a bit better. I removed them from the rails and cut a slot in the fabric about 2 inches in from each end. Now when you close them there is an over hang which extends beyond the edge of the window cutting out more light.
I can post a photograph if its unclear what I have done.
Ian

Infared- Member

-

Posts : 57
Joined : 2015-02-26
Member Age : 77
Location : Weston-super-Mare
Auto-Sleeper Model : Warwick Duo
Vehicle Year : :2011
 Re: Auto-Sleeper Warwick Duo Modifications
Hi Nimbus ,i done the same with work surfice but i used the little shelf from the shower room.ithought this she
F was useless in there? scotty
F was useless in there? scotty

Scotty1- Member

-

Posts : 67
Joined : 2014-05-03
Member Age : 69
Location : Kent
Auto-Sleeper Model : Warwick duo
 Re: Auto-Sleeper Warwick Duo Modifications
I have thought about getting my wife to insert a flexible magnetic plastic strip into a pocket at each end of the rear curtains. This would then close the curtain tightly against the metal doors. But I'm not sure whether they would rust over time and Mark the curtains.

nimbus- Member

-

Posts : 227
Joined : 2011-03-07
Member Age : 83
Location : Bristol
Auto-Sleeper Model : Warwick Duo
 Re: Auto-Sleeper Warwick Duo Modifications
You could have press studs put on your curtains with the stud part on the doors, I have these on my MH an Auto-sleeper fitment when built, looks like they have dispense with these on newer vans, an upholsterer could put the studs on for you, cost negligible.
Regards,
Margaret
Regards,
Margaret
_________________
Be who you are and say what you feel, because those that mind don`t matter, and those who matter don`t mind.
Dr. Seuss

daisy mae- Donator

-

Posts : 6189
Joined : 2013-02-03
Location : North Norfolk
Auto-Sleeper Model : Hampshire Topaz
Vehicle Year : 2008 98
 Re: Auto-Sleeper Warwick Duo Modifications
Drafty rear doors - already mentioned in this thread.
We have used some 19mm water heating foam pipe insulation which just about works OK when stuffed into the centre door joint. Cut to three different lengths top to bottom. We've also used a piece of the same to cover the bottom of the doors like a draft sausage.
My wife sewed some material over the foam insulation to beautify it a bit.
It seems to work well though I would suggest that if in a gale you might consider parking the front of the vehicle into the wind as we've had water coming through at the top of the rear doors forced through by the wind pressure.

Wigley Woggled- Member

-

Posts : 63
Joined : 2013-06-03
Member Age : 77
Location : Macclesfield
Auto-Sleeper Model : Warwick Duo
 Rear view camera
At last picked - up our Warwick Duo this week. The rear camera appears to have water on the inside of the lens. I believe it to be factory fitted, can anybody confirm that te lens cover can be removed for cleaning. 


suenmike- Member

-

Posts : 7
Joined : 2015-01-16
Member Age : 76
Location : Sleaford
Auto-Sleeper Model : Warwick Duo
Vehicle Year : 2011
 Re: Auto-Sleeper Warwick Duo Modifications
We had a small area of dust or condensation right in the the centre of the camera lens. I tried to remove the camera but it involves removing the fabric trim panel above the rear doors. The fabric is on top of some insulation which is glued in place and it looked to be difficult to remove without damaging it. So I gave up and didn't get any further. Interestingly the picture no longer had the misty patch in the centre, so I'm assuming that it was condensation which disappeared on its own.
However, looking at a photo of the camera on the Veba website it is held in place by a long hollow thread through the bodywork. The cable must go through the thread. I don't know whether the camera can be taken apart to clear the condensation as I never got that far.
But it's probably a job best left to a dealer or preferably Auto sleeper Service Centre.
Incidentally, a replacement camera is ridiculously expensive and is the best part of £200.

nimbus- Member

-

Posts : 227
Joined : 2011-03-07
Member Age : 83
Location : Bristol
Auto-Sleeper Model : Warwick Duo
 Re: Auto-Sleeper Warwick Duo Modifications
Our camera tends to get condensation, causing a poor image, in the winter but clears again in the summer.

Biker51- Member

-

Posts : 114
Joined : 2013-05-09
Member Age : 73
Location : Bournemouth
Auto-Sleeper Model : Sussex EB
Vehicle Year : 2012
 Re: Auto-Sleeper Warwick Duo Modifications
boxerman wrote:dandywarhol wrote:Y'know, the more I read on this excellent forum the more I wonder about AS, their design team and their assembly "engineers".
This is a case where a component manufacturer states one thing and AS seem to do as they please!
I wonder if anyone from AS read this forum and if they do - are they willing to come on board and refute or accept these facts?
When we bought our first van, a 1985 Auto-Sleeper RV50 I was impressed with the quality and attention to detail, which is why we looked for an Auto-Sleeper when we came to replace it. I am still quite impressed with our 1995 van but reading on this forum about some of the problems people are having with the newer vans, I can't help feeling that AS are letting (have let?) their standards slip somewhat.
Frank
And they haven't changed yet reading current posts

_________________
We are not here long so do it while you can


Jaytee- Donator

-

Posts : 3116
Joined : 2013-11-08
Member Age : 76
Location : Nr Filey North Yorkshire
Auto-Sleeper Model : Winchcombe
Vehicle Year : 2013
 Re: Auto-Sleeper Warwick Duo Modifications
Try magnetic self adhesive tape from Pound land, stick to curtain then when curtains are drawn mag tape sticks to door. And its only £1 which doesn't break the bank. regards sidecutter.daisy mae wrote:You could have press studs put on your curtains with the stud part on the doors, I have these on my MH an Auto-sleeper fitment when built, looks like they have dispense with these on newer vans, an upholsterer could put the studs on for you, cost negligible.
Regards,
Margare

sidecutter- Member

-

Posts : 37
Joined : 2016-02-01
Member Age : 69
Location : Burntwood, Staffs
Auto-Sleeper Model : broardway EL duo
Vehicle Year : 2014
 Re: Auto-Sleeper Warwick Duo Modifications
suenmike wrote:At last picked - up our Warwick Duo this week. The rear camera appears to have water on the inside of the lens. I believe it to be factory fitted, can anybody confirm that te lens cover can be removed for cleaning.
suenmike,
Check that the protective film has been taken off the lens. Mine was left on and after a few months, I noticed that the image was blurring.
I thought it was condensation but was glad to find that the film was beginning to peel off around the outside of the lens. Once removed back to clear vision

Hubert

Hubert- Donator

-

Posts : 191
Joined : 2014-04-27
Member Age : 70
Location : Filey, Yorkshire
Auto-Sleeper Model : Warwick Duo
Vehicle Year : 2016
 Re: Auto-Sleeper Warwick Duo Modifications
Hi and welcome to the forum from Bridlingtonsidecutter wrote:Try magnetic self adhesive tape from Pound land, stick to curtain then when curtains are drawn mag tape sticks to door. And its only £1 which doesn't break the bank. regards sidecutter.daisy mae wrote:You could have press studs put on your curtains with the stud part on the doors, I have these on my MH an Auto-sleeper fitment when built, looks like they have dispense with these on newer vans, an upholsterer could put the studs on for you, cost negligible.
Regards,
Margare
Boaby

burlingtonboaby- Donator

-

Posts : 14530
Joined : 2011-11-15
Member Age : 75
Location : Bridlington
Auto-Sleeper Model : Devon Firefly
Vehicle Year : 2018
 hello
hello
Cheers and thank you for that, the ASOF is very informative, and very interesting its great to read comments from like minded people. Regards from sidecutter.burlingtonboaby wrote:Hi and welcome to the forum from Bridlingtonsidecutter wrote:Try magnetic self adhesive tape from Pound land, stick to curtain then when curtains are drawn mag tape sticks to door. And its only £1 which doesn't break the bank. regards sidecutter.daisy mae wrote:You could have press studs put on your curtains with the stud part on the doors, I have these on my MH an Auto-sleeper fitment when built, looks like they have dispense with these on newer vans, an upholsterer could put the studs on for you, cost negligible.
Regards,
Margare
Boaby

sidecutter- Member

-

Posts : 37
Joined : 2016-02-01
Member Age : 69
Location : Burntwood, Staffs
Auto-Sleeper Model : broardway EL duo
Vehicle Year : 2014
 Re: Auto-Sleeper Warwick Duo Modifications
Thanks, scrolled back to this from today's post, that identified the mystery as to what these bits are used for.Spospe wrote:pjkxpjkx wrote:
Question which I think someone has already posted about but | cannot find it...
This is in the tool kit ( 2011 Peugeot Boxer) but was is it? RTFM no help.
[You must be registered and logged in to see this link.]
The bits in the tool kit form the adaptor to enable an alloy wheel to be winched up into the spare wheel storage position. In my opinion it will be easier to store a punctured wheel in the back, than mess about with the three bolts + the plate in order to take the tyre to be repaired. Unhelpfully, the driver's handbook makes no mention of this handy item, or its use.
_________________
In the land of the blind, the man with one eye is king

Paramedic- Member

-

Posts : 2487
Joined : 2016-01-27
Member Age : 77
Location : Chichester West Sussex
Auto-Sleeper Model : Broadway FB
Vehicle Year : 2013
 Re: Auto-Sleeper Warwick Duo Modifications
A couple of mods that I have done to 2017 warwick duo.
Fitted a divididing wall in nearside locker under bed and a u shaped rail to hold the bottom of the removable rear panel.
Reposition two of the clips that hold the panel in place in this privides storage for outdoor kit, ramps, cables, rear step, wellies accessable via the rear door without lifting the seat.
Second mod is running an extion lead with 3 240v sockets and 4 usb sockets from the one 240v sicket by the sink behind, sink and cooker and mounted by the side of the fridge.
The cable is in a quadrant trunking woodgrain finish from B & Q
We can now have kettle and Tassimo plugged in on the worktop plus charge 4 devices.

G8UZQ- Member

-

Posts : 25
Joined : 2016-06-12
Member Age : 72
Location : Derbyshire
Auto-Sleeper Model : Dorset
Vehicle Year : 2013
Page 3 of 3 •  1, 2, 3
 Similar topics
» Auto-Sleeper Warwick Duo Modifications 2017+
» Auto Sleeper Warwick
» Towbar 2016 Auto-sleeper Warwick XL
» Auto sleeper Warwick Duo 2012 . Awning size
» Warwick XL - Off-grid modifications
» Auto Sleeper Warwick
» Towbar 2016 Auto-sleeper Warwick XL
» Auto sleeper Warwick Duo 2012 . Awning size
» Warwick XL - Off-grid modifications
The Auto-Sleeper Motorhome Owners Forum (ASOF) :: Auto-Sleeper Motorhome Forums :: Auto-Sleeper "Van Conversions" Forum
Page 3 of 3
Permissions in this forum:
You cannot reply to topics in this forum